Generate a Class List report (Textbook Manager)
The Class List provides you with two types of lists:
- Teachers and the classes they are currently teaching
- Students and the classes in which they are currently enrolled
If you select Teachers, you can include students and their resources, either checked out or overdue. This lets you determine whether the teacher and students have the resources needed for a class.
When the class ends, you can see which students have not yet returned their resources.
|
Important: Textbooks checked out by ISBN appear on this report. |
To generate a Class List for teachers:
- Select Reports > Resource Reports.
- Under Circulation, click Class List. The report setup page appears.
- Do any of the following:
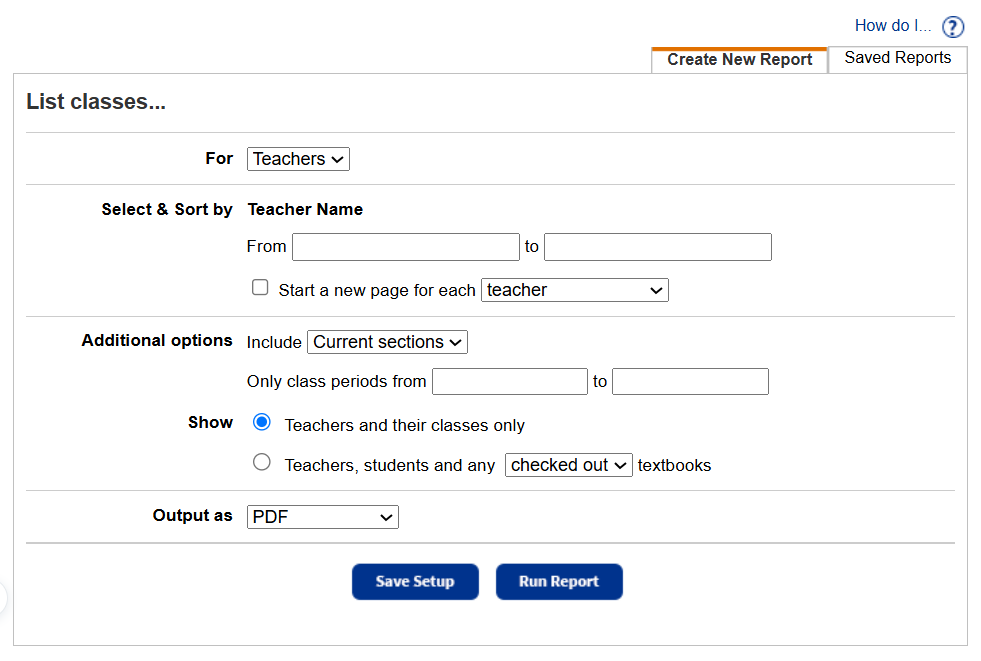
- From the For drop-down, select Teachers.
- Under Select & Sort by Teacher Name, enter the range in the From and to fields.
Note:
- You can limit to one teacher or an alphabetical range.
- All teachers: Leave both fields blank.
- One teacher: Enter the teacher in both fields.
- Up to and including a teacher (alphabetically): Leave the From field blank, and enter the teacher in the to field.
- A specific teacher and all those after it (alphabetically): Enter the teacher in the From field, and leave the to field blank.
- Wildcards (?, *) are supported for either all checkouts or just overdue textbooks; they are not supported in ranges.
- You can limit to one teacher or an alphabetical range.
- (Optional) Select Start a new page for each and either teacher or section/class period.
- Complete the Additional options fields as needed.
Notes:
- To limit the list to current sections only, leave the default option next to Include. Otherwise, select Past sections, Future sections, or All sections.
- To limit the list to classes in a specific period or range of periods, enter the numbers in the fields next to Only class periods from and to.
If you want to include classes in all periods, leave the fields blank. - To list just the teachers and classes, select Teachers and their classes only.
- To include the students and resource checkouts for each class, select the Teachers, students and any option. Then, select either checked out or just overdue resources.
- From the Output as drop-down, select PDF or Excel.
- Do any of the following:
- To run the report now, click Run Report.
- To save the setup, click Save Setup, and enter a unique name for the report. Then, do one of the following:
- Click Save to save the report.
- Click Save & Run to save the report and run it now.
- To run the report now, click Run Report.
To generate a Class List for students:
- Select Reports > Resource Reports.
- Under Circulation, click Class List. The report setup page appears.
- Do any of the following:
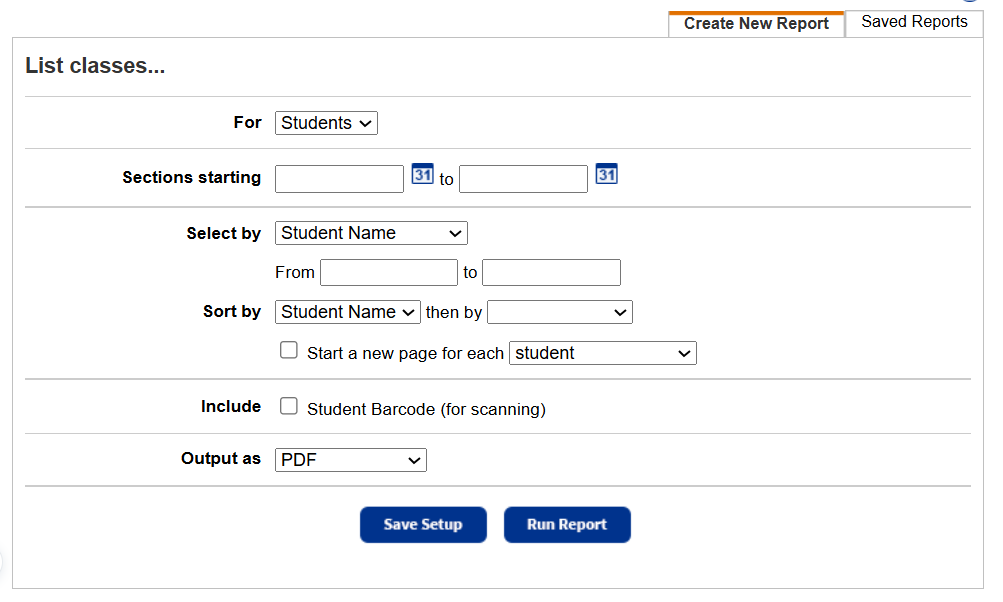
- From the For drop-down, select Students.
- In the Sections starting fields, type a range of dates for the sections. Destiny includes only sections that have starting dates within the range you define.
Note: When limiting by the section starting date, Destiny uses the Checkouts Start <>days before class starts date defined in the loan period for each section. If this date has not been defined for the loan period, Destiny uses the Class Starts date.
- Next to Select by, enter a range.
Note: - You can limit to one student or an alphabetical range.
- All students: Leave both fields blank.
- One student: Enter the student in both fields.
- Up to and including a student (alphabetically): Leave the From field blank, and enter the student in the to field.
- A specific student and all those after it (alphabetically): Enter the student in the From field, and leave the to field blank.
- You can limit to one student or an alphabetical range.
- Next to Sort by, select a way to sort your report and optionally, a subsort order next to then by.
- (Optional) Select Start a new page for each and either student or section/class period.
- (Optional) To Include Student Barcode (for scanning), select the checkbox.
- From the Output as drop-down, select PDF or Excel.
- Do any of the following:
- To run the report now, click Run Report.
- To save the setup, click Save Setup, and enter a unique name for the report. Then, do one of the following:
- Click Save to save the report.
- Click Save & Run to save the report and run it now.
- To run the report now, click Run Report.
Work with Saved Reports
A saved report appears on the Saved Reports tab, where you have more options:
- Add to Favorites: Click
 . Reports saved to your My Favorites page show a favorite icon,
 .
. - Run: Click Run. Each time you run the report, the results reflect the current contents of your textbook inventory.
- Edit: Click
 . When you resave a report after editing (even with a different name), the original report setup is overwritten.
 - Duplicate: Click
 . This is a quick way to create one or more additional reports based on the original saved report's settings.
 - Delete: Click
 . Destiny notifies you if the report is a favorite of any other users. When you delete a saved report, previously run reports are not deleted from the Report Manager.
|
Notes:
|
Additional Information
Class List for Teachers includes:
For each teacher:
- Teacher's name
- Patron Type
- Barcode number
For each of the teacher's classes:
- Class period
- Section name or number
- Class name
- Department
- Class Starts date
- Class Ends date
- Resources Due date
If you chose to include the students and their resource checkouts, under each class:
- Each student's name
- Patron Type
- Barcode number
- Textbook title
- Copy barcode number
- Due date of the resources they have checked out
The last line for each class displays the number of resources assigned to the teacher, the number assigned to students, and the total number checked out for this class.
|
Note: Students are included if they have been assigned to this class in Update Classes on the Admin tab, or they have checked out a resource in By Class for this class, or were reassigned one in To Teacher for this class. |
Their resources are included if the resource has been assigned to the class or section in and checked out to the student on any tab (To Patron, By Class, or reassigned in To Teacher).
They are also included if the student has checked out the resource in By Class for this class, or has been reassigned the resource in To Teacher for this class.
Any resources checked out to the teacher with the class undefined appear under an Undefined class.
Any resources checked out to the teacher for a defined class, but not yet reassigned to students, are listed above any students in the class.
Class List for students includes:
For each student:
- Student's name
- Patron Type
- Barcode number
- Scannable barcode (if selected)
For each of the student's classes:
- Class period
- Class name and ID
- Section name or number
- Class Starts date
- Class Ends date
- Teacher Name (if assigned to class)
- Textbook Title (if assigned to class)
- Textbook ISBN (if assigned to class)
- Textbook Checked Out date (if checked out)
- Textbook Due date (if checked out)
Sort List
- On the teacher list, the teachers are listed in alphabetical order.
- Under each teacher are the teacher's classes, listed in ascending order by period.
- Under each class, the students are listed in alphabetical order.
- On the student list, the students are listed in alphabetical order.
- Under each student are the student's classes, listed in ascending order by period.
- Under each period, the assigned resources are listed in alphabetical order.