Generate a Student to Textbook Statistics report
The Student to Textbook Statistics report helps you determine if your school or district as a whole has sufficient quantities of textbooks for all students enrolled in classes. It also identifies the sites with surpluses and shortages, which facilitates transferring textbooks between sites.
This report is useful at the beginning of each term or session, prior to or during distribution of textbooks. It can also be used to budget for new textbooks or when ordering replacements.
| Important: To generate a meaningful report, your school or district must have set up the classes and their sections, and assigned students and resources to them, in Admin > Update Classes. |
To generate the report:
- Select Reports > Textbook Reports.
- In the Statistics section, click Student to Textbook Statistics. The report setup page appears.
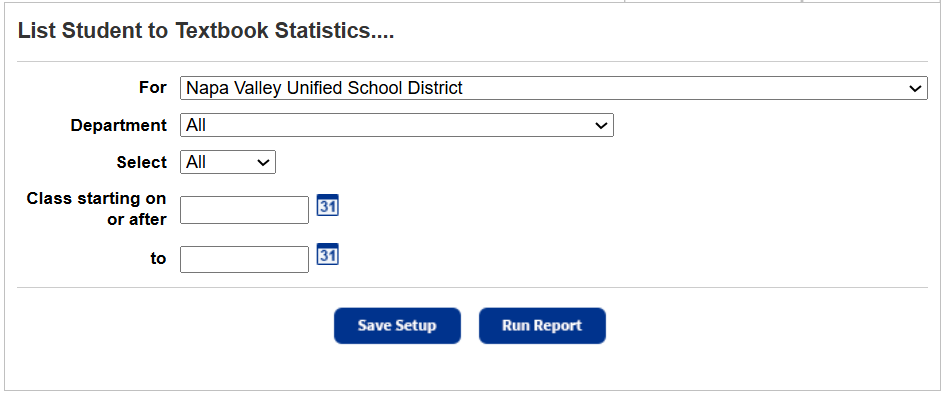
-
Do any of the following:
- If running the report at the district, use the For drop-down to select the district, site type, or an individual site.
- Use Department to include all or a single department.
- To limit the report to a particular textbook, use the Select drop-down to choose by Title or by ISBN, and enter the name or number in the field that appears.
- Use the Class starting on or after and to fields to enter the dates a class starts and ends, or click
 for a calendar.
Notes:
- You can limit to one class or a range.
- All classes: Leave both fields blank.
- One class: Enter it in both fields.
- Up to and including a specific class: Leave the Class starting on or after field blank, and enter a date in the to field.
- A specific class and all those after it: Enter a date in the Class starting on or after field, and leave the to field blank.
- You cannot use wildcards (?, *) in ranges.
- You can limit to one class or a range.
- Do any of the following:
- To run the report now, click Run Report.
- To save the setup, click Save Setup.
- Enter a name for the report.
Note: You must choose a name that is unique for the report at your school. - Do any of the following:
- To save the report to run later, click Save.
- To save the report and run it now., click Save and Run.
- Enter a name for the report.
- When the Report Manager opens, click View to open the report.
Work with Saved Reports
A saved report appears on the Saved Reports tab, where you have more options:
- Add to Favorites: Click
 . Reports saved to your My Favorites page show a favorite icon,
 .
. - Run: Click Run. Each time you run the report, the results reflect the current contents of your textbook inventory.
- Edit: Click
 . When you resave a report after editing (even with a different name), the original report setup is overwritten.
 - Duplicate: Click
 . This is a quick way to create one or more additional reports based on the original saved report's settings.
 - Delete: Click
 . Destiny notifies you if the report is a favorite of any other users. When you delete a saved report, previously run reports are not deleted from the Report Manager.
|
Notes:
|
List content
If you are running the report for a single school, the report lists the following information for every textbook that has been assigned to a class section:
- Title and ISBN
- Default budget category (if available)
- Department
- Class name and ID
- Number of actual students enrolled in all sections of the class
- Total number of copies at the school with a Status of Available, Checked Out, or In Transit
This number does not include those with a Status of Loaned Out, Lost, On Order, or Out for Repairs, or those that have a condition of Unusable.
It does not include any teacher's editions or resource kits. - Total number of students enrolled in all classes that use the title
- Shortages or surplus
If you are running the report for a group of schools or for the district, the report lists the following information for each textbook:
- Title and ISBN
- Default budget category (if available)
- Name of each school that has copies of the textbook
- Total number of copies at that school
- Number of incoming transferred copies for that school
- Total number of students enrolled in all classes at that school that use the textbook
If a student is enrolled in multiple classes that use the same textbook, Destiny assumes the student needs only one copy. - Shortages or surplus
- Total number of copies of a textbook at all included schools, minus those that have a Status of Lost, Loaned Out, On Order, or Out for Repairs, and those that have a condition of Unusable.
It does not include any teacher editions or resource kits. - Total number of students enrolled in all classes that use the title
- Shortages or surplus
At the bottom, the summary lists the number of titles with extra copies, and the number of titles with a shortage.
For a textbook title to appear on this report, it must be assigned to at least one class or section.
Sort Order
For group or district reports, titles, and then schools appear alphabetically.
For school reports, title, departments, and then classes appear alphabetically.
If you generated the report at a school and chose District Summary, your school is listed first and the other schools appear alphabetically after yours.
Report Uses
This report lets you determine if you have sufficient quantities of textbooks for your students.
If generated at the district, it can help you determine whether you need to transfer copies from one school to another to meet demand.
It can assist you on textbook distribution days, to budget, and to order replacement materials.